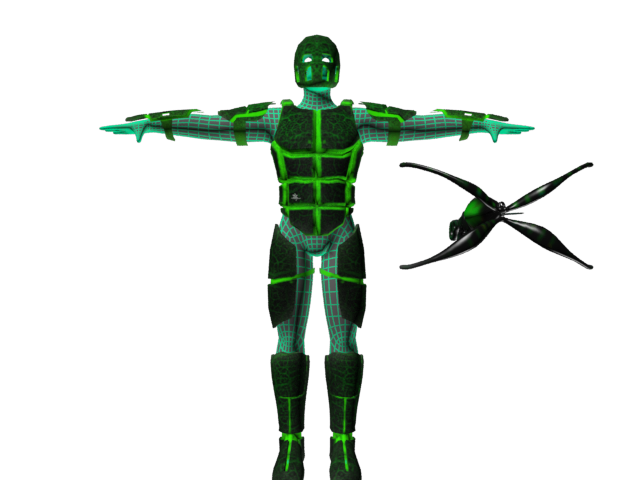
I finished the textures for the William Tell armor. I had based the textures off of the weapon textures. I wanted them to match or at least go together. I know in the original concepts everything was in black and white, but I never ended really intended to have the textures stay black and white. The concepts were merely to show the armor type/look. The base mesh texture is a wireframe composite material from 3ds Max, so in game engine it will only be plain gray. I'm thinking that the wireframe look can be done in unity using a shader. As for animations, I've been using some animations from last semester and trying to edit it to my liking.
Along with the armor, I felt that the crossbow could use a visual update. The previous crossbow wasn't bad, but it wasn't great either. I went for a futuristic look but also something eye catching. At the time that I was texturing I was thinking of an old project I did my first semester. It was a shooting game involving a lot of spiders. I based the textures off of that texture.
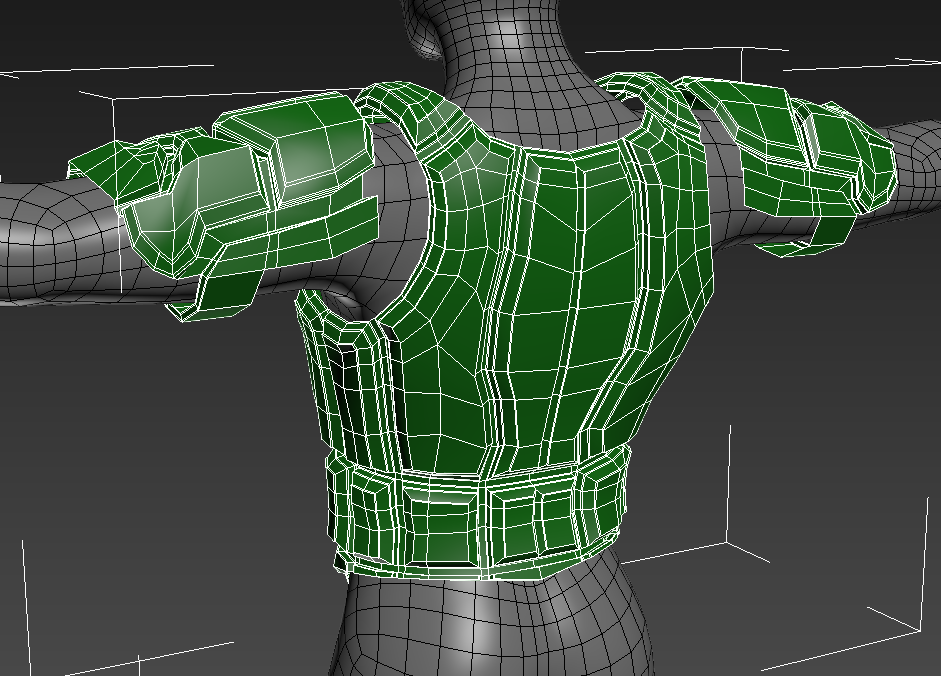
I finished the armor modeling. However, I had a lot of geometry that I felt that I could remove. In the hard surface modeling tutorial I watched, support edge loops were used a majority of the time. These loops helped with telling 3ds Max that the edge between the other two was a hard edge. Although these loops helped initially, this model is for a game, and geometry is limited, so I looked up trying to use smoothing groups on the model to achieve the same look but with less geometry.
Video on using smoothing groups for exporting in Mudbox.
I managed to use smoothing groups effectively. I was able to export my file into Mudbox while keeping the hard surface look that normally would have been smoothed out. I was able to optimize my model. Below is a comparison. Utilizing smoothing groups, I was able to cut my poly count by roughly 2500 while having little to no change in appearance.
After watching the video, I got a good idea and concept of hard surface modeling. I modeled out a couple of pieces.
After receiving some critiques on my concepts, I can start working on modeling out the armor for the William tell armor. I decided to try to take elements of the concepts and model out armor pieces. I'm trying to maintain the style but give it a futuristic look to it. It's a little challenging because I never really liked modeling out hard surfaces since I've had difficulties with it in the past; I prefer organic modeling. I looked at some tutorials to see if I can get a better understanding of hard surface modeling.
After doing research. I created several concepts for the William Tell character. I used the real-life references as my influence. I focused more on the type of armor and design of the armor than the color. Also, I realized that we want a futuristic look, but that can be accomplished through the model/texturing.
The art team is doing a bit of back peddling. We're starting with coming up with concepts for the crossbowman/rocket man. We had some concept art from the previous semester, but a lot of them weren't used. Also, there wasn't much direction when we created the original concepts. By redoing this step, hopefully we'll have a more streamline art style. I'm focusing on the William Tell character, and primarily researching armor from that era. Then once I have some good references, I can start making concepts. Here are several examples I found.


